Build a Crypto Portfolio Dashboard: A Complete Guide
Step-by-step guide to building a crypto portfolio dashboard in Next.js with the Octav API: search any wallet, decode tokens and DeFi across 50+ chains.
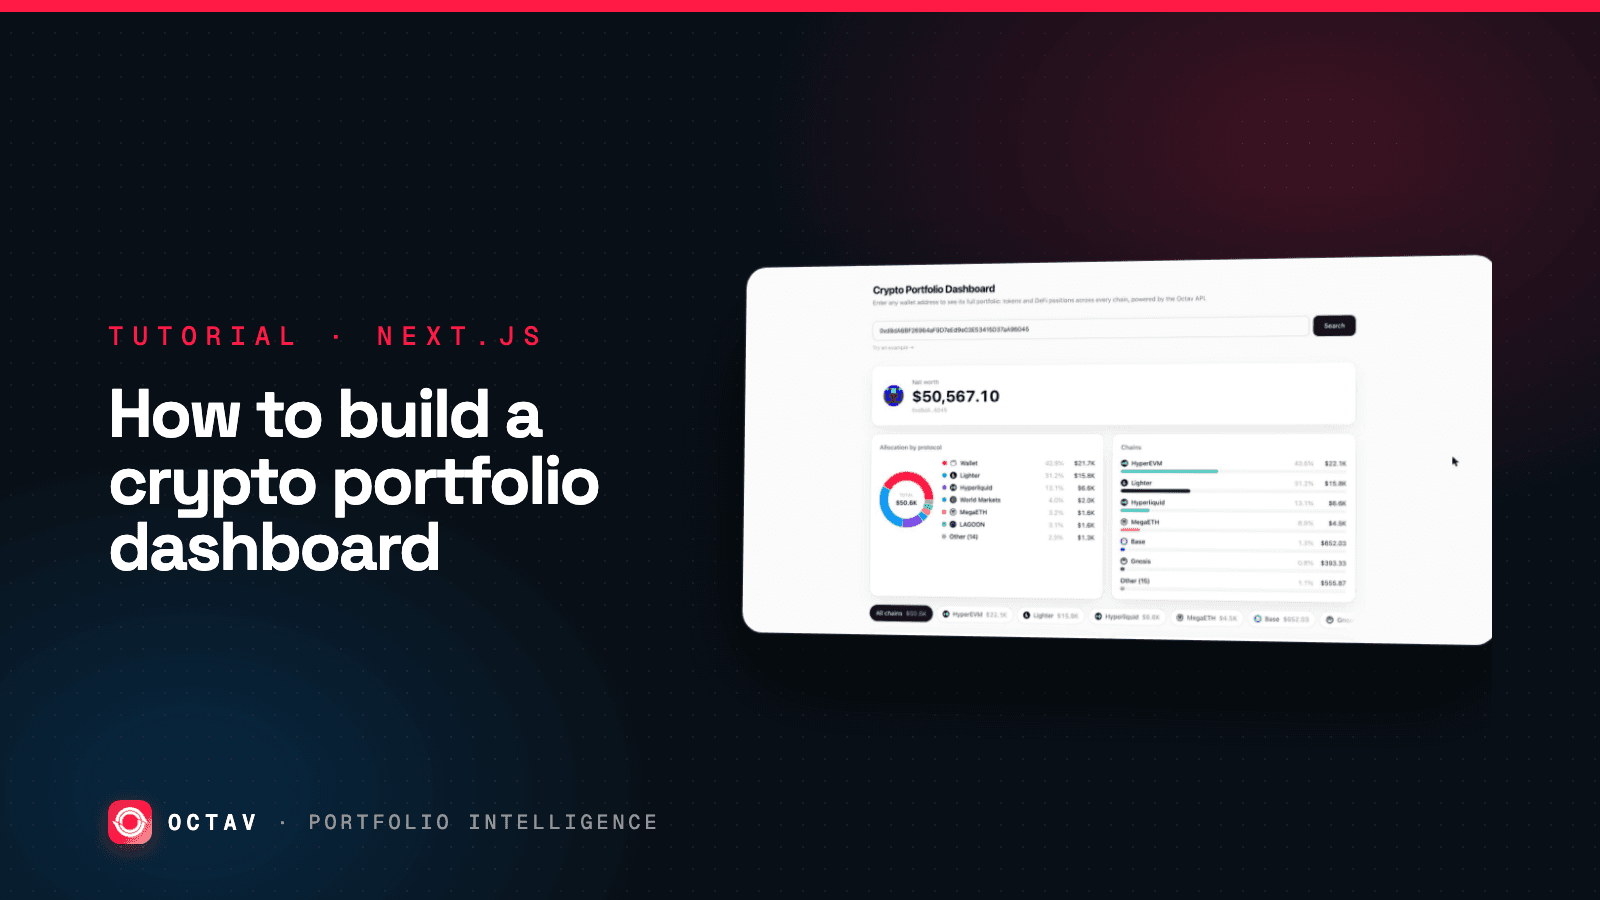
You will build a working crypto portfolio dashboard in Next.js: type any wallet address, get its net worth, allocation, token holdings and DeFi positions across 50+ chains. The whole thing is one search box and one API call.
The finished code is open source — clone it, run it, ship it: github.com/Charlie85270/octav-portfolio-dashboard-tuto.
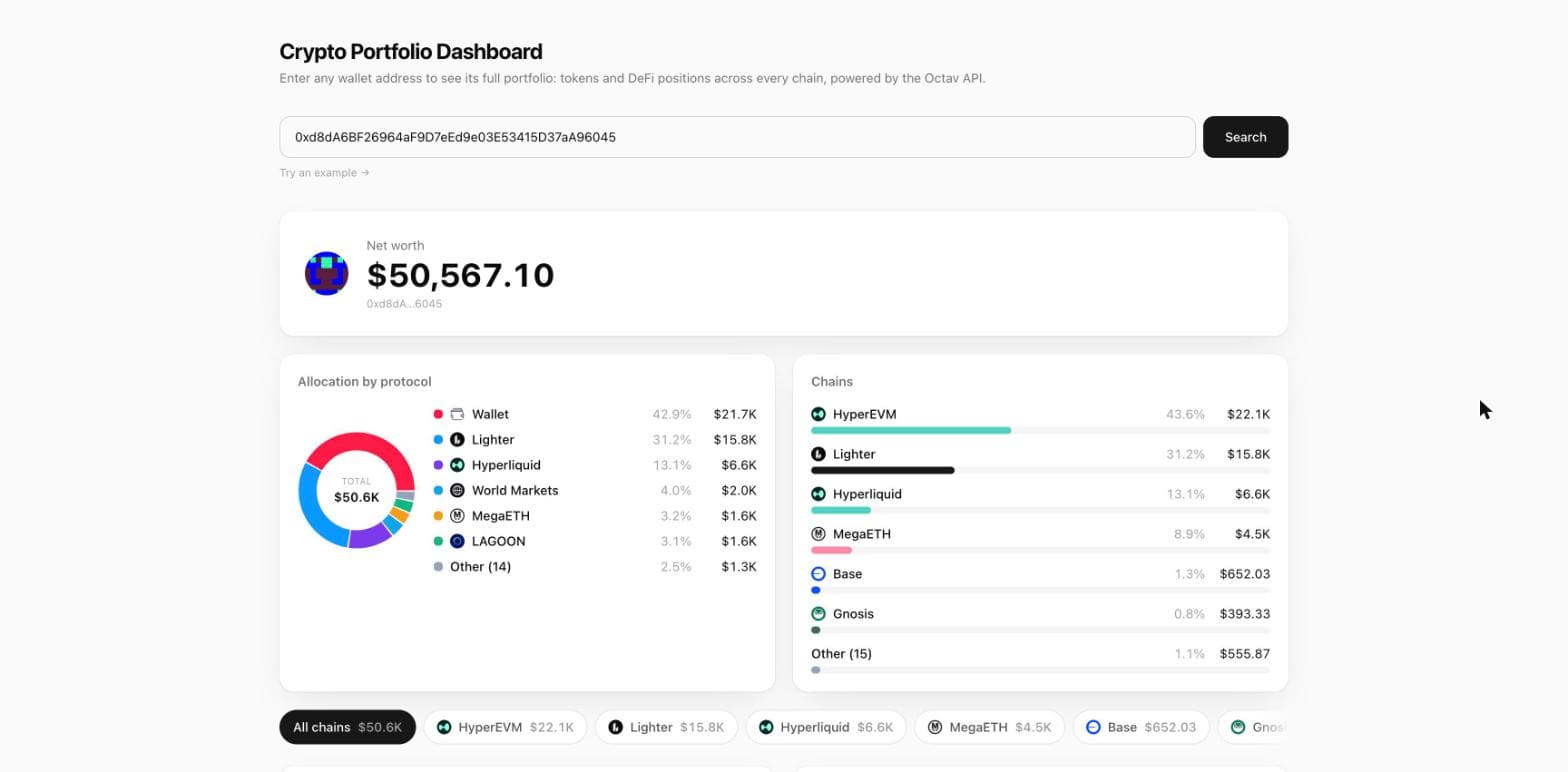
This guide walks the build step by step. Every snippet is copy-paste-able and matches the repo. If you just want to run it, skip to Run it locally.
What you are building
A read-only dashboard that turns a wallet address into a full portfolio view:
- Net worth with a generated wallet avatar
- Allocation by protocol (donut) and by chain (progress bars)
- A chain selector that filters the whole portfolio to one network
- Token holdings with logos, balances and USD values
- DeFi positions grouped by protocol in an accordion
It is read-only by design: it never asks for a private key and cannot move funds. It only ever reads public on-chain state through an API.
Why not just query balances yourself?
A raw balance query — balanceOf on a few token contracts — only sees tokens
sitting loose in the wallet. For an active wallet that is often the minority
of its value. The rest is inside protocols: supplied to Aave, LP'd on Uniswap,
staked, or held as a Hyperliquid perp. Those positions are not balances; each
protocol stores them differently, and decoding them yourself means integrating
each one.
The Octav API decodes all of it — tokens and protocol positions — in a single request, and returns logos and USD values with it. That is what makes a one-file dashboard possible. See Why portfolio APIs disagree about your net worth for what "decoded" actually buys you.
What you need
| Requirement | Notes |
|---|---|
| Node.js 18+ | Any recent LTS. |
| An Octav API key | Free to create; a call costs one credit, credits from $10. Get one at data.octav.fi. |
| 20 minutes | The app is small on purpose. |
You do not need a key to see the UI — the app ships with sample data and falls back to it when no key is set. Add a key when you want to query real wallets.
Step 1 — Scaffold the app
npx create-next-app@latest portfolio-dashboard --typescript --tailwind --app
cd portfolio-dashboard
npm install recharts blockies-react-svg
recharts draws the allocation donut; blockies-react-svg generates the
wallet avatar from the address.
Step 2 — Put the API key on the backend
The single most important decision in this build: the API key never touches the browser. The browser sends an address to your server; your server adds the key and calls Octav.
browser ──(address)──▶  /api/portfolio  ──(Bearer key)──▶  api.octav.fi
                        reads key from env,                /v1/portfolio
                        normalizes the payload
If you called Octav directly from client-side React, anyone could open the
network tab, copy your key, and spend your credits. A server route keeps the
key in process.env, where the browser can't see it.
Create app/api/portfolio/route.ts:
import { NextResponse } from "next/server";
import { getPortfolio } from "@/lib/octav";
import mock from "@/lib/mock.json";

// GET /api/portfolio?address=0x...
// Runs on the server. The browser sends only an address; the Octav
// API key never leaves the backend.
export const dynamic = "force-dynamic";
export const maxDuration = 30;

export async function GET(request: Request) {
  const input = new URL(request.url).searchParams.get("address")?.trim();
  if (!input) {
    return NextResponse.json({ error: "No address provided." }, { status: 400 });
  }

  const addresses = input
    .split(/[\s,]+/)
    .map((a) => a.trim())
    .filter(Boolean)
    .slice(0, 10); // keep credit spend bounded per request

  // No key yet? Return sample data so you can see the dashboard before
  // signing up. Set OCTAV_API_KEY in .env.local to query real wallets.
  if (!process.env.OCTAV_API_KEY) {
    return NextResponse.json({ data: { ...mock, address: input } });
  }

  try {
    const portfolio = await getPortfolio(addresses);
    return NextResponse.json({ data: portfolio });
  } catch (error) {
    const message = error instanceof Error ? error.message : "Failed to load portfolio.";
    return NextResponse.json({ error: message }, { status: 502 });
  }
}
Put your key in .env.local (never commit it):
OCTAV_API_KEY=your-key-hereTo get a key: sign in at data.octav.fi, create an API key, and buy a few credits (from $10 — most calls cost one credit). See the endpoint reference for what each call costs.
Step 3 — Fetch and decode the Octav payload
This is the heart of the app. /v1/portfolio takes one address per call and
returns a rich, nested payload. Two query flags matter:
includeImages=true— returns chain, token and protocol logos, so you don't have to source them.waitForSync=true— returns freshly indexed data instead of a possibly-stale cache.
Create lib/octav.ts. First, the fetch (server-side, reads the key):
const BASE = process.env.OCTAV_API_BASE || "https://api.octav.fi";

async function fetchOne(address: string) {
  const key = process.env.OCTAV_API_KEY;
  if (!key) throw new Error("OCTAV_API_KEY is not set. See .env.example.");

  const url = `${BASE}/v1/portfolio?addresses=${encodeURIComponent(
    address,
  )}&includeImages=true&waitForSync=true`;

  const res = await fetch(url, {
    headers: { Authorization: `Bearer ${key}` },
    signal: AbortSignal.timeout(28_000),
  });

  if (res.status === 401) throw new Error("Octav rejected the API key (401).");
  if (res.status === 402) throw new Error("Out of Octav credits (402).");
  if (!res.ok) throw new Error(`Octav error ${res.status}.`);

  const json = await res.json();
  return Array.isArray(json) ? json[0] : (json?.data?.[0] ?? json?.data ?? json);
}
Understanding the response
The payload has three parts you care about:
| Field | What it holds |
|---|---|
networth | Total USD value of the wallet. |
chains | A map of every chain the wallet touches, with per-chain value and logo. |
assetByProtocols | A map keyed by protocol. The special wallet key holds loose tokens; every other key is a DeFi protocol with its positions. |
That wallet-vs-everything-else split is the key insight. Loose tokens live
under assetByProtocols.wallet; a lending position lives under
assetByProtocols.aave. normalize() flattens both into a shape the UI can map
over:
function normalize(raw, address) {
  const networthUsd = num(raw.networth);

  // Allocation by chain
  const chains = new Map();
  for (const [key, c] of Object.entries(raw.chains ?? {})) {
    const value = num(c.value);
    if (value > 0) chains.set(key, { key, name: c.name ?? key, valueUsd: value, img: c.imgSmall });
  }

  const tokens = new Map();
  const positions = [];
  const byProtocol = [];

  for (const [key, proto] of Object.entries(raw.assetByProtocols ?? {})) {
    byProtocol.push({
      key,
      name: key === "wallet" ? "Wallet" : proto.name ?? key,
      valueUsd: num(proto.value),
      img: proto.imgSmall,
    });

    for (const [ck, chain] of Object.entries(proto.chains ?? {})) {
      for (const cat of values(chain.protocolPositions)) {
        if (key === "wallet") {
          // Loose token holdings.
          for (const a of values(cat.assets)) {
            if (num(a.value) <= 0) continue;
            const id = `${a.chainKey ?? ck}:${a.contract ?? a.symbol}`;
            tokens.set(id, {
              symbol: a.symbol?.toUpperCase() ?? "?",
              chainKey: a.chainKey ?? ck,
              img: a.imgSmall,
              chainImg: chains.get(a.chainKey ?? ck)?.img,
              balance: num(a.balance),
              valueUsd: num(a.value),
            });
          }
        } else {
          // A DeFi position (lending, LP, staking, perp…).
          if (num(cat.totalValue) <= 0) continue;
          positions.push({
            protocol: proto.name ?? key,
            protocolImg: proto.imgSmall,
            label: cat.name ?? key,
            chainKey: ck,
            chainName: chains.get(ck)?.name ?? ck,
            chainImg: chains.get(ck)?.img,
            valueUsd: num(cat.totalValue),
          });
        }
      }
    }
  }

  return {
    address,
    networthUsd,
    byChain: [...chains.values()].sort(byValue),
    byProtocol: byProtocol.filter((p) => p.valueUsd > 0).sort(byValue),
    tokens: [...tokens.values()].sort(byValue).slice(0, 50),
    positions: positions.sort(byValue),
  };
}
The full file — including the helpers (num, values, byValue) and merging
several addresses into one view — is in the repo under lib/octav.ts. For a
deeper look at how protocol positions are decoded, see
Track DeFi positions across chains.
Step 4 — The search box and net worth
Now the UI. app/page.tsx is a client component: a search box posts the address
to your /api/portfolio route and stores the result.
"use client";
import { useState } from "react";
import Blockies from "blockies-react-svg";

export default function Home() {
  const [address, setAddress] = useState("");
  const [portfolio, setPortfolio] = useState(null);
  const [loading, setLoading] = useState(false);

  async function load(value) {
    if (!value.trim()) return;
    setLoading(true);
    const res = await fetch(`/api/portfolio?address=${encodeURIComponent(value)}`);
    const json = await res.json();
    setPortfolio(json.data ?? null);
    setLoading(false);
  }

  return (
    <main className="mx-auto max-w-6xl px-5 py-10">
      <form onSubmit={(e) => { e.preventDefault(); load(address); }}>
        <input
          value={address}
          onChange={(e) => setAddress(e.target.value)}
          placeholder="0x… or vitalik.eth or a Solana address"
        />
        <button type="submit">{loading ? "Loading…" : "Search"}</button>
      </form>
      {/* …results… */}
    </main>
  );
}
Once portfolio is set, the net worth card pairs the value with a wallet
avatar generated straight from the address:
<Blockies
  address={portfolio.address.toLowerCase()}
  size={8}
  scale={6}
  className="h-12 w-12 rounded-full"
/>
<p className="text-4xl font-bold tabular-nums">{usd(portfolio.networthUsd)}</p>
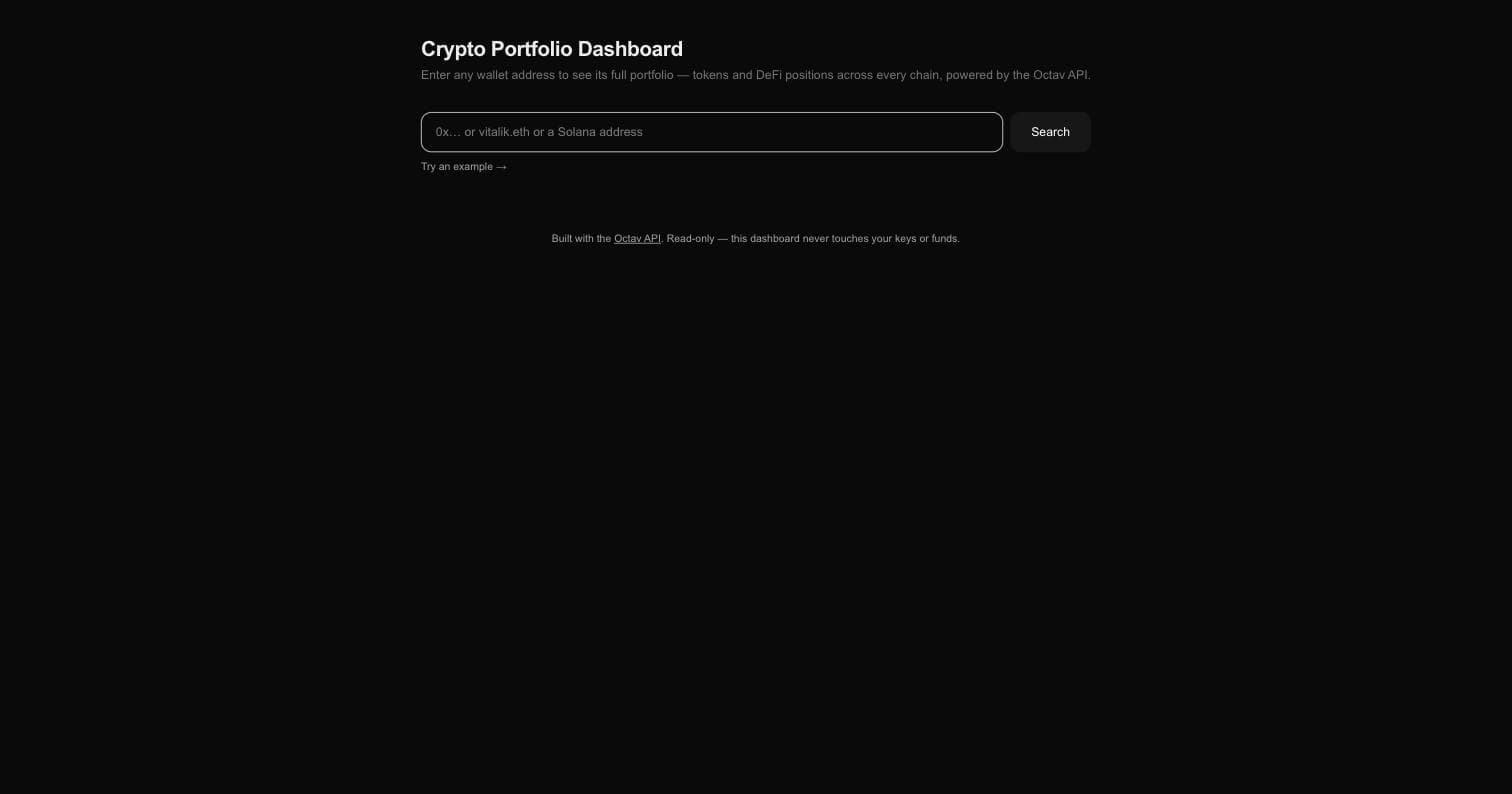
With no key set, searching anything returns the sample portfolio, so the empty state is never really empty:
Step 5 — Charts and the chain filter
Two charts read at a glance: an allocation-by-protocol donut (Recharts) and
by-chain progress bars. Both map over the normalized arrays — byProtocol
and byChain — and use the same colour palette so the two views agree.
The chain selector is a single scrollable row of logo buttons. Selecting one
sets a chain state value; the token and position lists filter to it with one
line each:
const [chain, setChain] = useState(null);

const tokens = chain
  ? portfolio.tokens.filter((t) => t.chainKey === chain)
  : portfolio.tokens;
const positions = chain
  ? portfolio.positions.filter((p) => p.chainKey === chain)
  : portfolio.positions;
That is the whole filter: because every token and position already carries its
chainKey from normalize(), narrowing the view is a client-side filter, not
another API call.
Step 6 — Tokens and DeFi positions
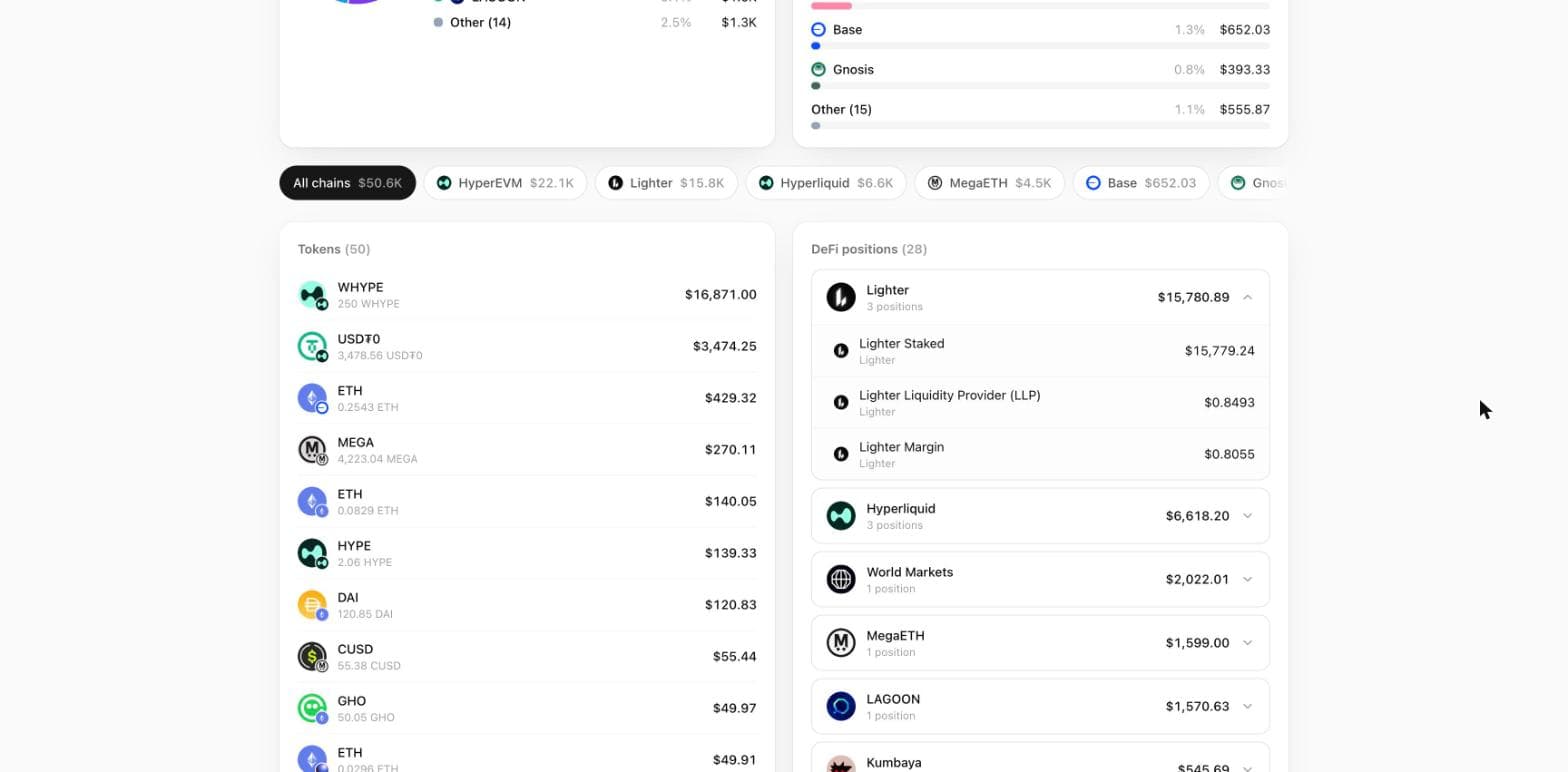
The two lists are deliberately different shapes, because the data is:
- Tokens are flat rows — logo, symbol, balance, USD value — sorted by value.
- DeFi positions are grouped by protocol into an accordion. A protocol like Lighter or Hyperliquid may hold several positions; grouping keeps the list readable and lets the reader drill in. The largest protocol opens by default so there is always something to see.
Both are plain components that map over portfolio.tokens and
portfolio.positions. The full source is in components/ in the repo.
Run it locally
git clone https://github.com/Charlie85270/octav-portfolio-dashboard-tuto.git
cd octav-portfolio-dashboard-tuto
npm install
cp .env.example .env.local   # add your key, or leave blank for sample data
npm run dev
Open http://localhost:3000 and search a wallet. With no
key it shows sample data; add OCTAV_API_KEY to .env.local and restart to
query real addresses. Try vitalik.eth first.
Deploy it
Push to GitHub, import the repo into Vercel, and set
OCTAV_API_KEY in the project's environment variables. Because the key lives in
a server env var and is only read inside the API route, it stays server-side in
production too. That's the whole deploy.
Where to go next
The dashboard is a starting point. Some obvious extensions:
- Historical net worth — chart value over time from the historical endpoint.
- A live iframe instead of a build — if you don't want to maintain a frontend at all, embed the Octav widget.
- Agent access — the same data feeds an AI agent; see AI agent tools for crypto data.
- Not sure Octav is the right API? — How to choose a crypto portfolio API compares the options on coverage.
Get the code
Everything above is in one repo, MIT-licensed:
github.com/Charlie85270/octav-portfolio-dashboard-tuto
Fork it, swap in your key, and you have a crypto portfolio tracker that sees the whole wallet — tokens and DeFi — across every chain, from one API call.
Keep reading
 API & Developers
Portfolio at Block: A Complete Guide
Query a wallet's exact decoded portfolio at any historical block on Ethereum, Linea and Monad — decoded Uniswap V4 everywhere, V3 on Linea.
3 min read
 API & Developers
How to Choose a Crypto Portfolio API
A buyer's guide to evaluating crypto portfolio APIs — the tests to run, the questions vendors dislike, and the trade-offs between coverage, cost and latency.
3 min read
 API & Developers
Crypto Portfolio API Endpoint Reference
Every Octav API endpoint with its parameters, credit cost and response, plus authentication, rate limits and caching behaviour for building on portfolio data.
2 min read